• Skip to primary navigation
  • Skip to main content
  • Skip to primary sidebar
  • Skip to footer

Ericas Ed-Ventures

Primary Education Ideas

  • Home
  • Blog
  • Classroom Decor Inspiration
  • Teacher Style
  • Shop
  • Contact

How to Get Started on Teachers Pay Teachers & Some Advanced TpT Tips!

I originally wrote a blog post about getting started on TpT a few years back.  I decided to update that original post.  I was often emailed and asked how to get started on TpT (TeachersPayTeachers) and as a full time teacher and TpT seller, I think it would be unfair to expect me to give individual coaching.  What I could do, is write a blog post which is mutually beneficial to both of us.   This post contains affiliate links, these are links where I make a small percentage of the sale at no additional cost to you.
Starting to sell on TpT is not something that can simply be explained in one paragraph.  I don’t want you to think TpT is super complicated, but it also is not as easy as making a PB&J sandwich.   If it were easy, no one would buy from us!   I do hope this post helps you decide if creating resources on TpT is right for you.
I would like to start saying that it should be stressed that TpT is not some get rich quick plan.  Everyone puts in different amounts of effort and that is what is so wonderful about TpT.  There is no commitment on your part.  You are free to create as little or as many products as you like.  Remember though that your expectations for TpT have to match your level of effort and patience.  I put in an extreme amount of effort and work into TpT.   I may not be a top seller but I try and stay positive and keep on working hard because this is something I love doing.  When I don’t work as hard, I don’t sell as much.
If making things for TpT is not something you love doing, then don’t torture yourself.  If you are like me and find making products on the computer to be a great creative outlet, read on!
Seems simple enough, right?!
*Update: TpT closed down their referral program.
Here is my referral link if you are all ready to sell!
https://www.teacherspayteachers.com/Signup/referral:EricaBohrer
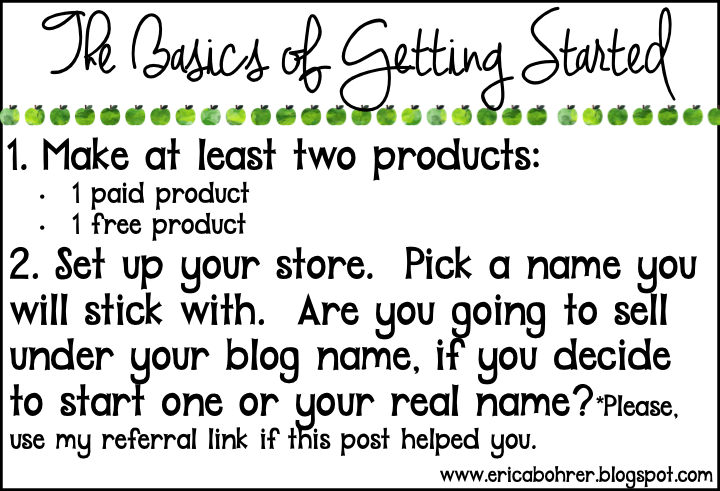
Most sellers start selling under the Free Membership.  They see how they do creating products and how their products sell.  Then once they decide to commit to creating products for TpT, they switch over to the Premium Membership.
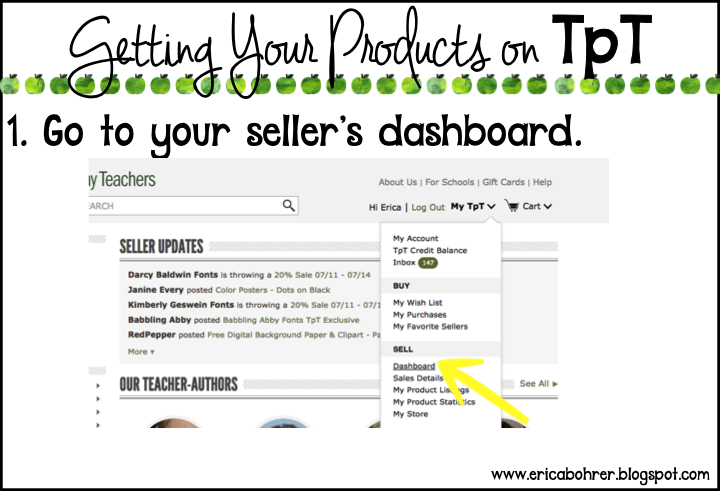
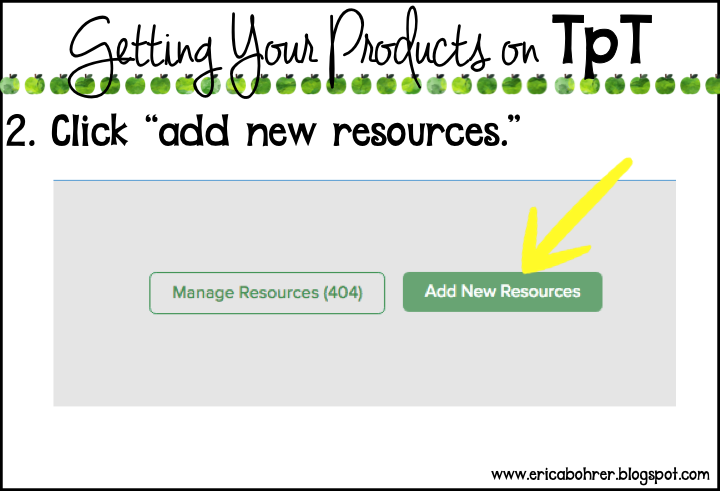
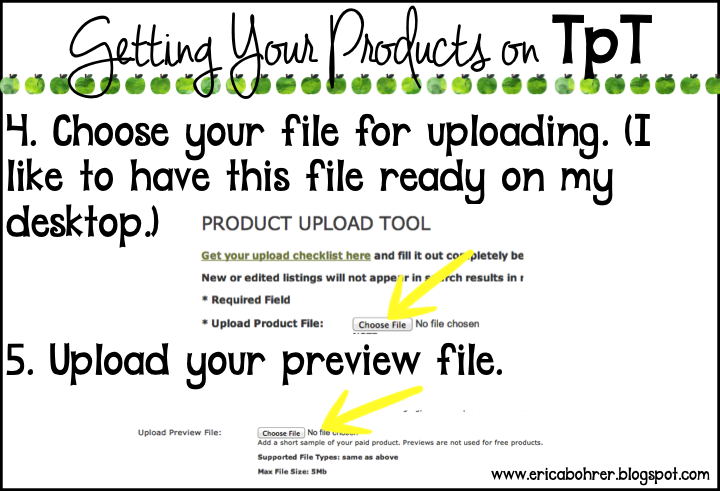
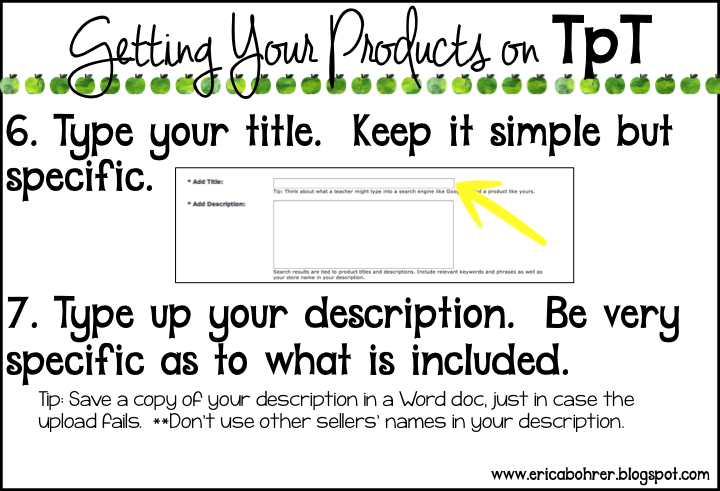
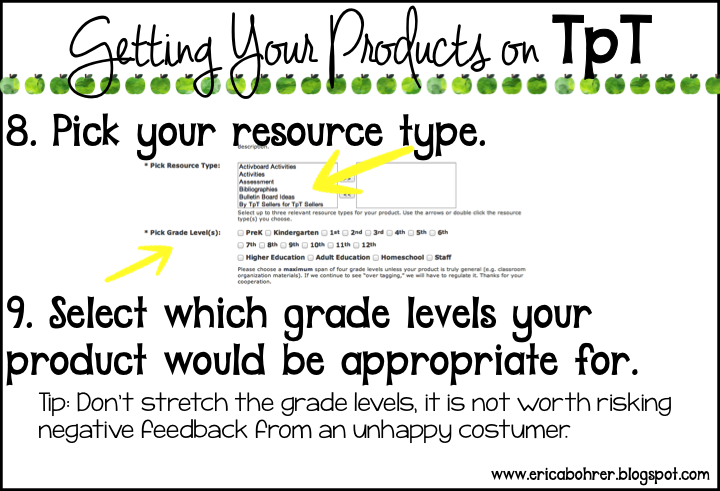
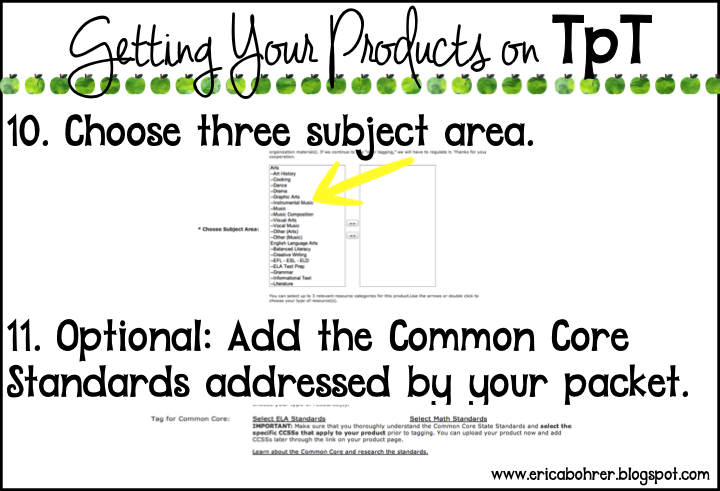
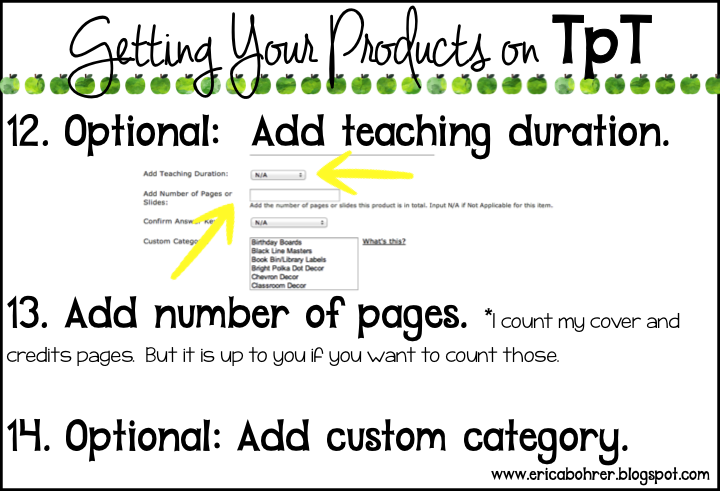
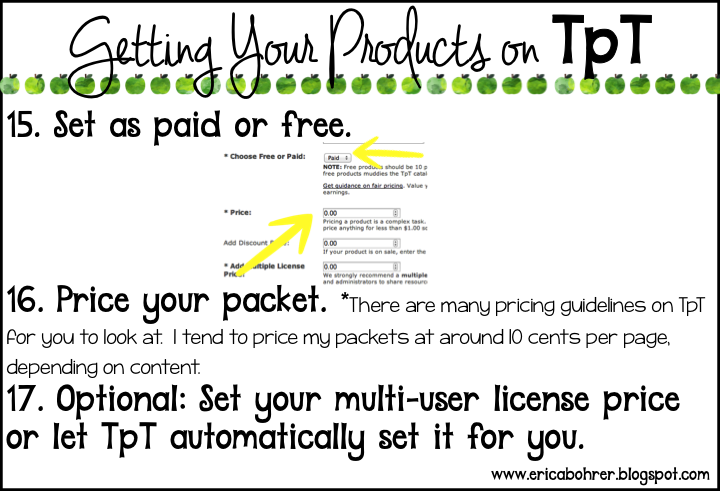
Breaking it down further:
I often get asked what computer and what programs I use to make my products.   I own a Mac desktop and a MacBook Air.  I purchased Microsoft Office for them.  I love using PowerPoint and did not feel that Pages was comparable.    I did not start out creating in Power Point!  I started on TpT in 2008 and I used Word to create my documents.   Oh, how I wish I had known about Power Point back then.  I actually learned about Power Point from Rachelle Smith of What the Teacher Wants.  She posted in the TpT forums about using Power Point and I gave it a shot!

I perfected my Power Point skills with tutorials by Ladybug Teacher Files and Ashley Hughes.   You can find many other wonderful tutorials by googling.   I googled and found GCF Learn Free, which breaks it down by the version of Power Point you have.   I found that the more I used Power Point the better and faster I got with it.  It is so easy to duplicate a page, no more copy and pasting like in Word or clicking “enter” to get to the next page.  It is also a whole lot easer to manipulate and adjust graphics!
Now you are ready to create a product!

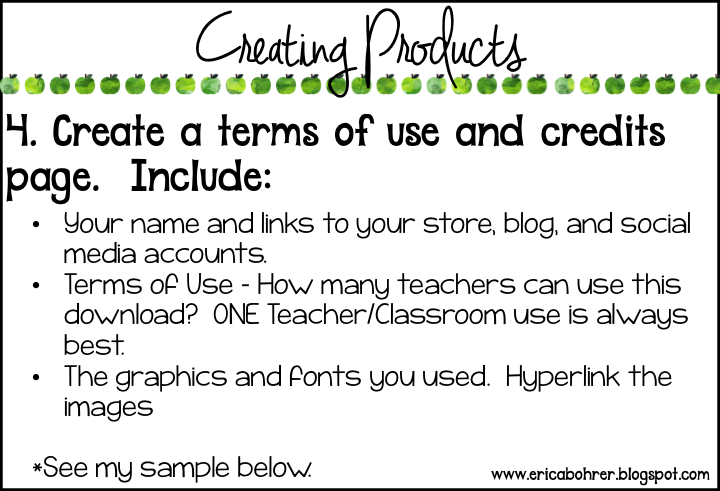
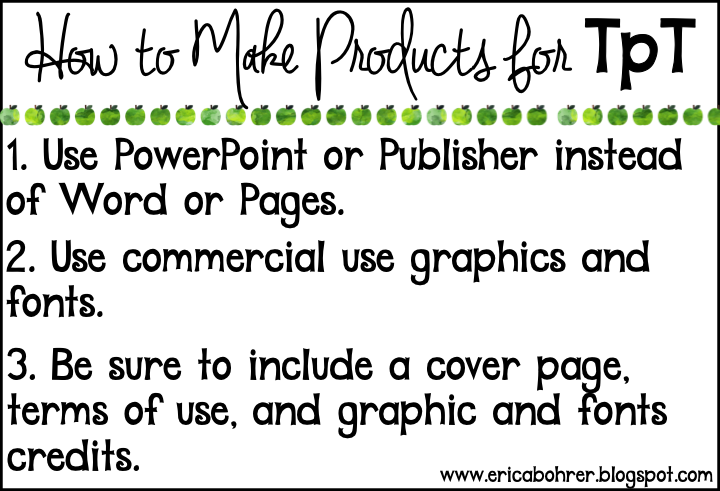
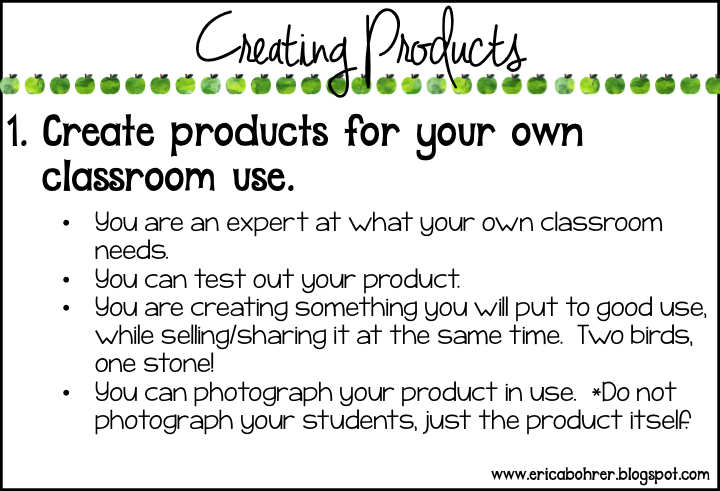
I don’t know if this is obvious or not, but do not create products at school or during school time.  You are getting paid by your district for that time and it might be considered double dipping, if you used that time to create products.  Who has time to create during the school day anyway?!  I create all my products at home after work, on weekends, and whenever I have off from school.   I always created for my own classroom, even before TpT.  The difference is that now, I create products that are above and beyond what I would create for my own personal classroom use.  I use commercial use fonts and commercial use graphics instead of just “google imaging.”  I include directions for teachers, standards, a cover page, etc.  All of this takes time and money.   Therefore, I have no qualms about selling my products.

I think creating for TpT has made me a better teacher.  I have been teaching first grade for the past 14 years and I continue to reinvent and change my teaching activities.  I am excited to try something new with my students that I created and they are excited to try it.  I also share everything I create with all of the teachers on my grade level in my district.  I don’t expect them to use it all, I just want to share and make their lives a little easier if I can.  Their positive feedback and the positive feedback I get from TpT buyers encourages me to keep creating.   It is just a lovely cycle!    With the extra money I make from TpT, I don’t flinch about buying supplies for my classroom.  I have the best classroom library around.  Other teachers come to me to borrow books!  I love that I can help them, too.
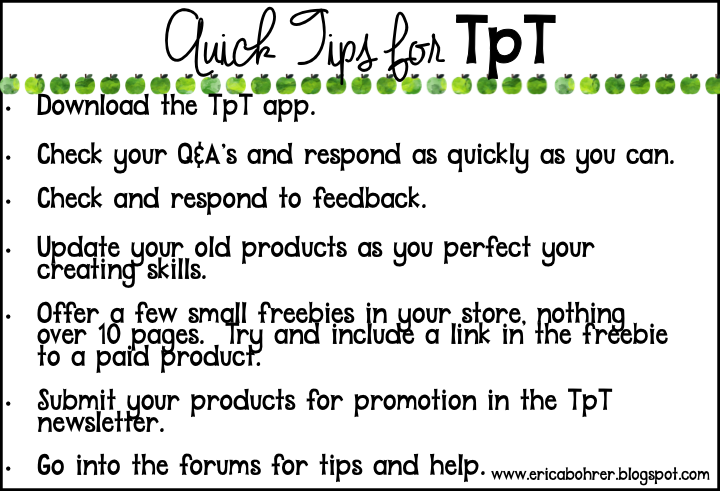
The positive feedback makes the isolated world of working alone on your computer, feel like you are part of something bigger.  Sometimes you won’t get a “thank you” or any “praise.”  For me, that is one of the toughest things.  I will share my products or create a freebie and not one “thank you.”  I remind myself, not to let it bother me:
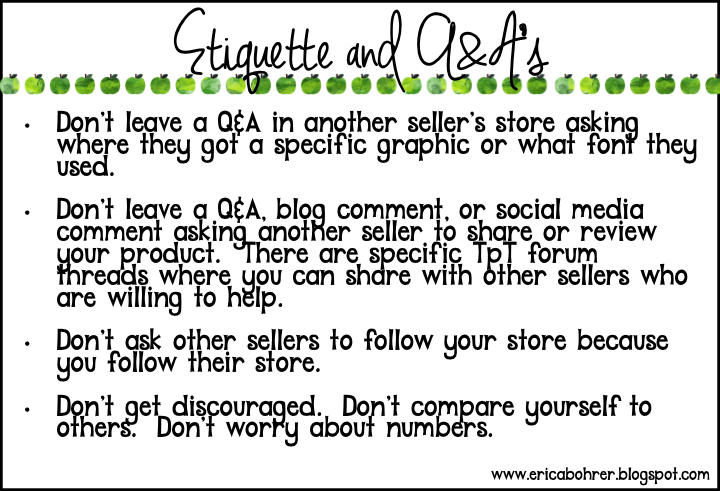
Another thing you will have to get accustomed to when putting your products out there and with blogging is criticism.  Oh, it hurts, it makes you mad, it can make you nuts!  Negative feedback on TpT always bothers me.  Teachers by nature are perfectionists and I cannot allow myself to make anything subpar.  Often the feedback is just someone complaining for the sake of complaining.  I just tell myself that I did my best and that it is not possible to please everyone all the time.   If you start selling don’t let the negative feedback get you down but don’t ignore it either.  Is there some validity to what the buyer is saying?  Can you update your product or make your description more clear?  If so, do it!  You can always write a response back to the buyer explaining yourself.  Refrain from attacking the buyer.  If you are angry with the feedback, wait a couple of days to respond in a polite and professional manner.

I ended up going through three printers before I found the printer that I absolutely love.  When you create a lot of products for TpT, you will find yourself printing a lot of TpT products.  A good printer is essential.  I recommend the HP Laserjet Pro 200 Color M251NW.

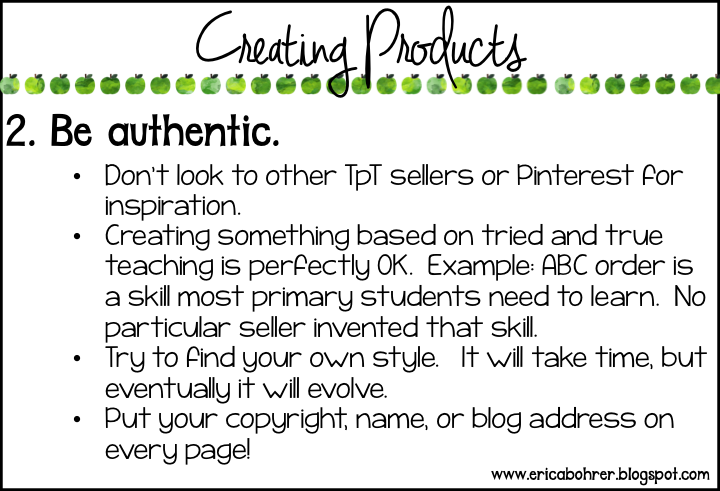
I know my readers would never do this, but I have heard of sellers buying products and then remaking it as their own to sell.  Seriously?  Why?  That is just not the TpT way.   I actually don’t open any products other sellers email me (sorry ladies).  I just don’t want to be influenced.  I also stay away from teaching ideas on Pinterest.  Ideas are bound to be similar, don’t go jumping to conclusions thinking someone copied your product.  One of my good blogging friends and I posted almost the exact same Thanksgiving freebie the same day.  Did either of us accuse the other of copying?  Nope!  We both taught first grade, had a similar need for our classrooms, and used the same Melonheadz freebie turkey clip art.  It was just a simple coincidence or occurrence of “great minds thinking alike.”  A great way to prevent your actual product pages from getting stolen is to put your copyright mark or name on the bottom of each page.   I screenshot my image and insert it to ever page.
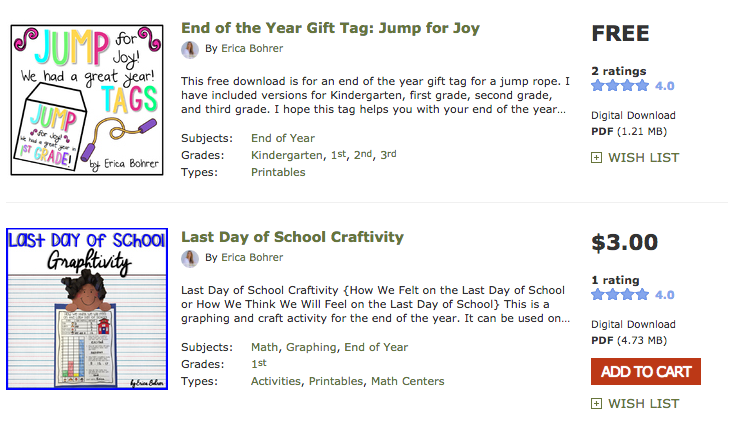
Getting your own style can take a while to evolve.  Look at some of my first products on TpT and look at my newer ones!
2008 products
2016 Products
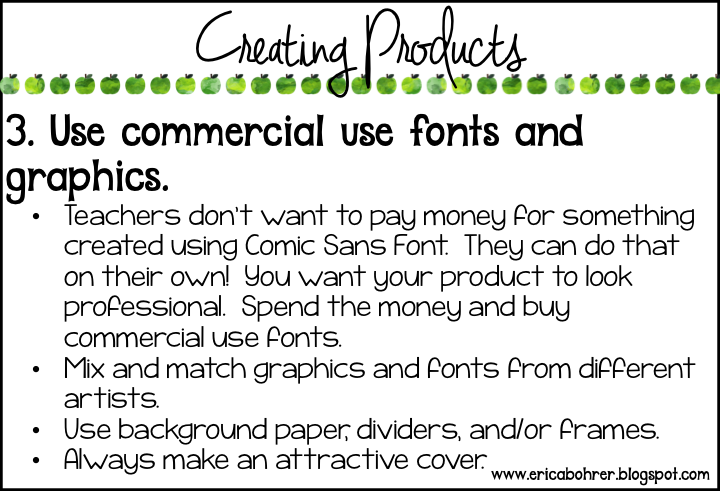
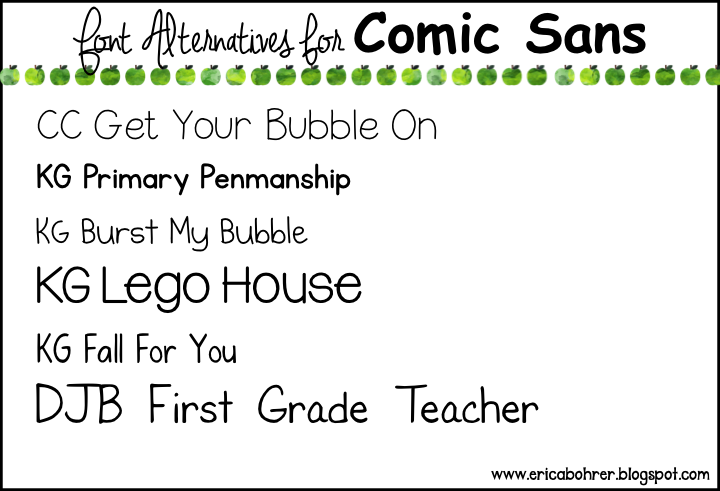
Look at those 2008 products above.  Did you notice the Comic Sans font and Word graphics?  Do you think those are my best sellers?  Yeah, not even close!  I actually hid those packets from my store!  I do plan on eventually updating those older packets and have done so to many of them.   Unfortunately, I did not make them in Power Point and I would just have to start all over rather than copy and paste from Word.
1. Graphics From the Pond
2. EduClips
3. Paula Kim Studio
4. Whimsy Workshop Teaching
5. Creative Clips
6. Bubbly Borders
7. Whimsy Clips
8. Ashley Hughes
9. Melonheadz
10. Glitter Meets Glue
*2026 Update – I also LOVE Bunny on a Cloud for Graphics and try to only use her clip art in my phonics resources.
There are so many amazing clip art artists on TpT.  I am discovering new ones all the time.  Sometimes I like to search by recently posted just so I can find the latest and discover new sellers.
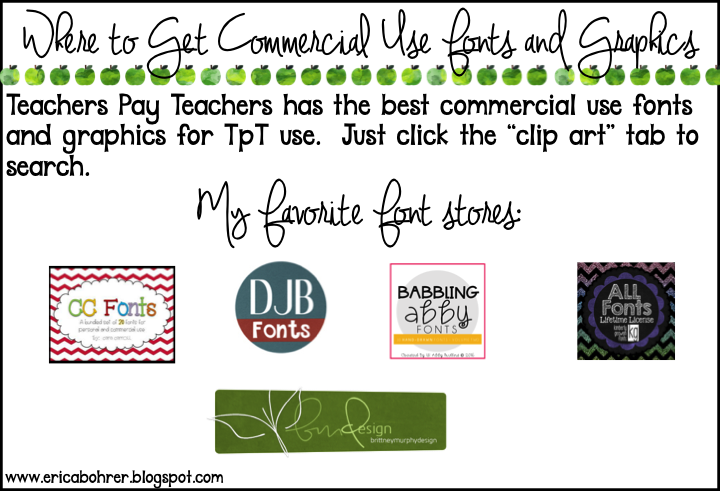
1. CC Fonts
2. DJB Fonts
3. Babbling Abby Fonts
4. KG Fonts
5. BMD Fonts
I also recently discovered Creative Market.  They have both graphics and fonts.  You just have to look closely at their terms of use.

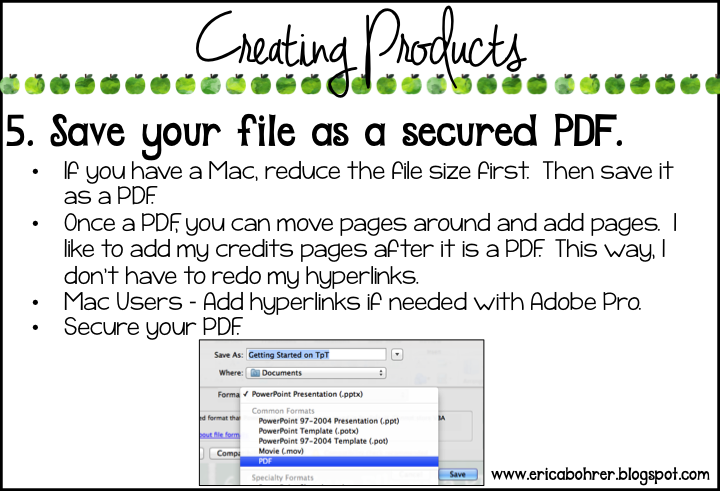
For some reason you cannot add hyperlinks before you create a PDF with Mac.  To get around this problem, I purchased Adobe Pro.  It is pretty expensive, so if you are not anticipating making the cost of the program back in TpT products, you may want to look into other cheaper PDF editing programs.
Here is a link for a post I did a while back on merging PDF files.  You will need to do this if you are working with both landscape and portrait Power Point files.
More honesty: I am totally guilty of not having my PDF files all locked.  When I started selling, I thought a PDF was considered locked.  Now, apparently people can manipulate PDF files with PDF editor programs.  So it is a good thing to learn how to do.  The 3am Teacher has a great tutorial on locking your PDF files. She also has many other useful tutorials.   Take some time and check them out.
Here is another post by Teaching with Hope:
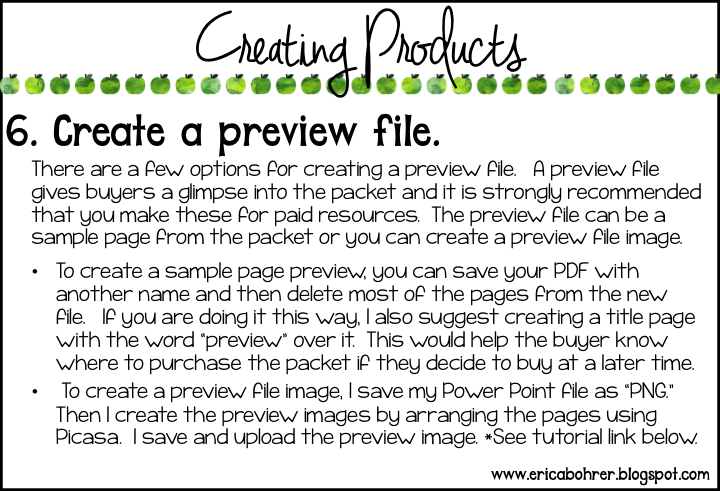
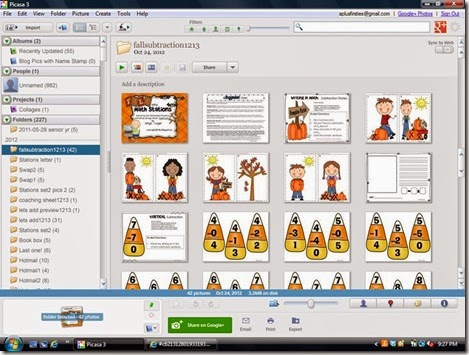
Tanya Dwyer has a great tutorial on using Picasa:

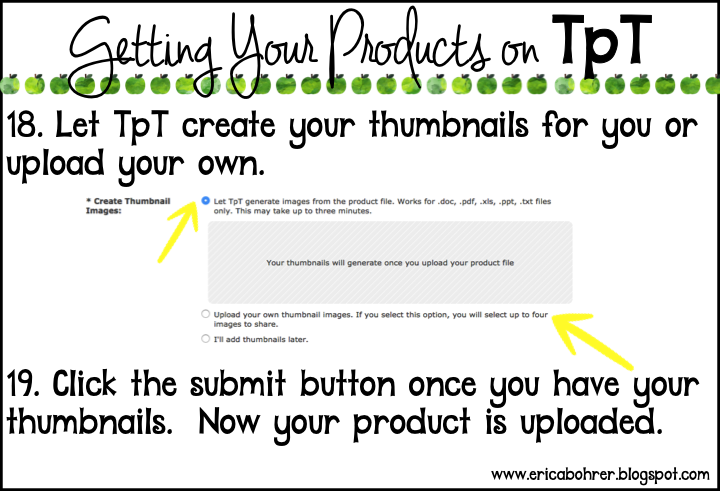
Now you are ready to post:
************************************************************************
Here are some more advanced tips for TpT.  Pin this post and come back to it after you have gotten your TpT feet wet.

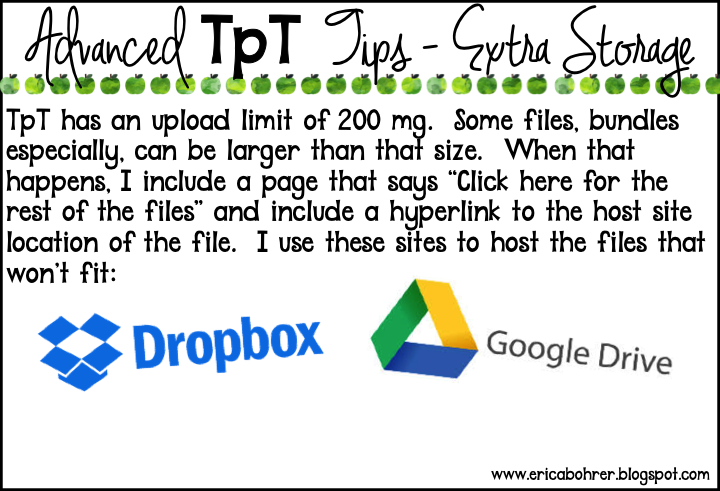
Click the images to check out these free storage sites:

*Update: TpT now allows you to bundle files!  This makes it so much easier for buyers to download and for you to create bundles.

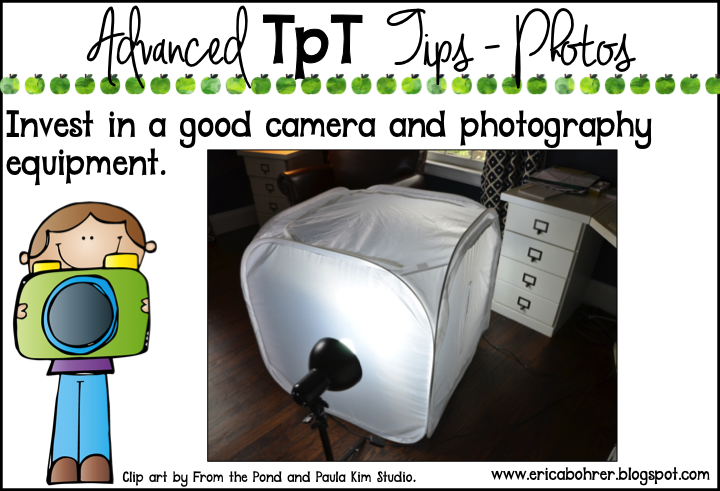
Recommended Cameras:
I have the Nikon Camera above.
Click here to check out these photo lights.
Click here to check out the photo tent above.
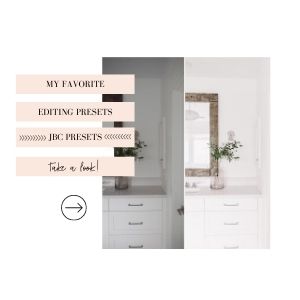
I  recently started using presets on my iPhone through the Lightroom App and JanaBishop.  So easy!  It looks like I took photos with my good camera! You can use Code: Erica20 to receive 20% off!
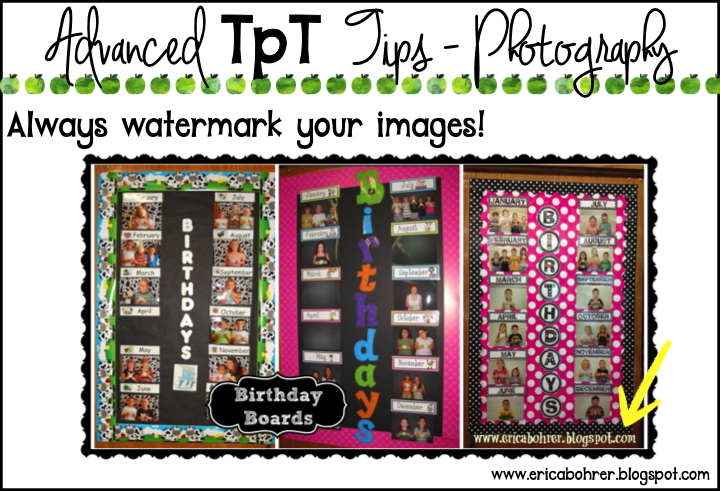
I often use PicMonkey to watermark my photos  but you can insert a photo into Power Point and then add the watermark.  This is good for blog posts because they will show up on image searches.
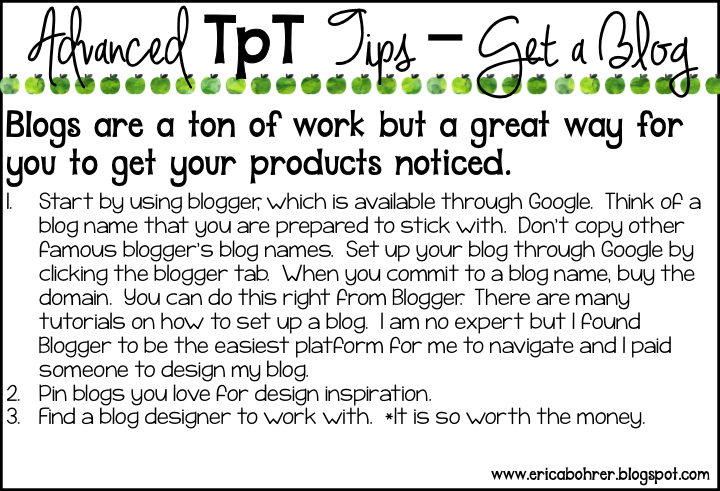
I used Becca from Jumping Jax for this current WordPress design.  It was a big jump for me to go over to WordPress and Becca was great with the migration.   If you want to start on Blogger (it’s free) and then migrate to WordPress later on, you can always do that.  That is exactly what I did.
I was recently introduced to Link In Profile for Instagram and I LOVE it.  It sends customers right to the link in your TpT store or your blog.  No more “I can’t find it.”  Click below for a free 30 day trial.
We all know teachers search via Pinterest for teaching ideas.  You want to make sure your pins are circulating out there.  To do that, you can schedule pins with tailwind.  Click below to check out Tailwind.
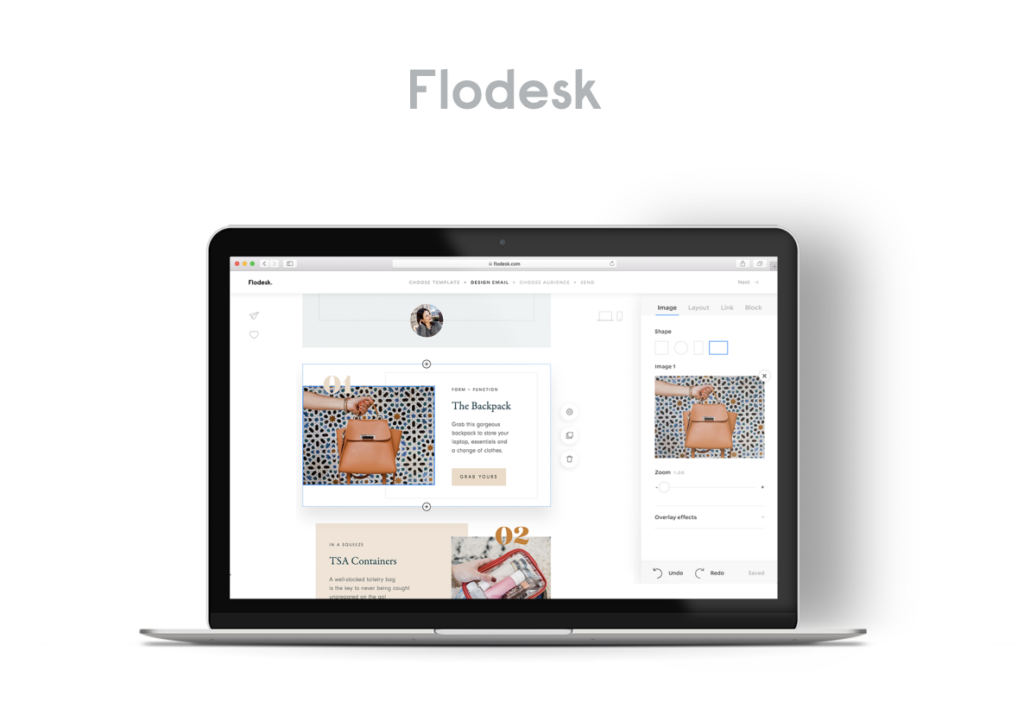
Newsletters are also a great way to reach your audience.  I love using Flodesk.  It is easy to use and has pretty templates.  It is also a LOT cheaper than the other email list programs.
If your buyers are having trouble printing and/or downloading, feel free to send them to this post:
I often get asked how do I do it all…and I always laugh because I don’t!   My house is a mess and I rarely cook.   Working two full time jobs means something has got to give.
One more thing I have to say about blogging and TpT, is that you might not gain financial riches but you will gain friends.  I think my TpT friends are worth their weight in gold!    I am so glad that TpT brought them all into my life.
Thanks for reading!  I hope I helped you with your TpT and blogging adventure.
*This post contains some affiliate links.   That means if you purchase an item I have linked, I get a small percentage of the sale at no additional cost to you.
I have a few more tutorials to the right if you click “Blogging and TpT Tips.”

Filed Under: Blogging and TpT Tips, Uncategorized

Previous Post: « Orlando Teacher Meet Up!
Next Post: Black and White Polka Dot Classroom Decor Ideas »

Reader Interactions

Comments

  1. Kallie Glascock

    July 12, 2016 at 5:41 am

    Thank you so much for this awesome post. I know it must have taken forever to write. I appreciate all of the information, though.

  2. Ms. Dunn

    July 12, 2016 at 12:27 pm

    I have been toying with the idea of selling on TpT. Thank you for this post. It answers a lot of my questions.

  3. Marilyn Gleason

    July 12, 2016 at 4:09 pm

    Very informative and just what I needed as I am trying to get my first TPT products ready to upload. Thank you so much.

  4. Kristin

    July 13, 2016 at 4:33 am

    From a fellow Long Islander and novice TpTer, thank you for this post! I had always wondered about securing pdfs as I use a mac and looked at the tutorials you linked up. The only issue I had was when it was secured, my designer font with specific Spanish characters was no longer. Is that normal?

  5. Stephanie Cameron

    July 13, 2016 at 6:14 pm

    Thank you for this post. I had no idea that selling on TPT was so involved! I think I'll just stick with buying products & making some plain jane type activities for my own classroom use. I have a lot to learn! lol. I certainly had appreciate all of your hard work a lot more now!

  6. Treetop Creations

    July 13, 2016 at 7:17 pm

    Wow! Thank you for taking the time to share all of this great information. It is so helpful to have everything in one place. I will be referring back to this post again and again.

  7. Lisa C

    July 14, 2016 at 11:19 am

    Thanks so much for the detailed post, Erica! It was very helpful (as someone who's slowly adding to her TPT store!) and definitely taught me some new tricks and techniques. You're a great creator–keep it up, and thanks for encouraging others!

  8. Kelley Kolpitcke

    July 26, 2016 at 4:13 am

    Really. Thank you. As I plan, create, curate, and develop my products, I appreciate all the tips on doing it "right", the first time…albeit there will most certainly be mistakes! Ha! But your time was so generous and I promise to pay it forward and help others down the road. Take care and have a great start of the year!!!!

  9. Ilinca Sadoveanu

    August 28, 2016 at 6:41 pm

    Thanks for the hard work you put into writing this article: it is great and I'm sure it will help a lot of teachers.

    Ilinca from Grumpy Dumpling

  10. Chris

    August 29, 2016 at 1:06 pm

    Thank you for including advanced TpT Tips! I'm 6 months into this journey, so I feel I know the basics- The photography tips were great!

  11. Language Speech and Literacy

    October 20, 2016 at 2:13 am

    Thank you so much for taking the time to share this helpful information. I'm sure I will refer to this article often!
    Linda

  12. Kris

    September 22, 2017 at 2:43 am

    OMG! What a wonderful post. Thank you so very much; I'm a newbie to TpT. Kris

Primary Sidebar

  • Email
  • Facebook
  • Instagram
  • Pinterest
  • Twitter
  • YouTube

Search

Categories

Subscribe via Email

Featured Products

Disclosure: This website/blog contains affiliate links.  What that means is that when you click on a link to a merchant and purchase something, I get a small percentage of the sale at no additional cost to you.

Footer

Latest on Instagram

📚 Back-to-school magic starts with the right read- 📚 Back-to-school magic starts with the right read-alouds!
These are my absolute favorite first-week books for building classroom community, easing those first-day jitters, and setting a positive tone from day one.
From Our Class is a Family, All Are Welcome, The Book of Rules, and so many more — these stories never miss.

Which one is a must-read in your classroom? Drop it in the comments and I will send you the links to my follow up activities!

#BackToSchool #ReadAlouds #picturebooks
These play-doh first day gifts are cute and practi These play-doh first day gifts are cute and practical!  The play-doh gives your students something fun to do while you are busy greeting students at the door.  Then once everyone is in, then you can unpack supplies as a class. 

Want the link to the FREE tags and to see what else I do on the first day?  Comment “first day” below and I will DM you the links!

#teacherhack #teacherfreebies #playdoh #teachersfollowteachers #backtoschool
How do you handle this situation? Do you put the How do you handle this situation?  Do you put the new student at the end of the alphabetical list or do you start over with a new one?
I know I am next for a new student (I have 24 kids and everyone else has 25), so I am holding off until the night before the first day.  I wish I could just wait but I like modeling where their bags and mail goes, both of which are set up using numbers.

True story: One year on the first day, I had a no show.  Then I was assigned a new student.  That student fit perfectly in the alphabetical order spot that was left.  I should have played the lottery or something.  What were the odds of that?!

#teacherproblems #teacherhumor #primaryteacher
5 things that are worth the money for your classro 5 things that are worth the money for your classroom!

1. A color printer.  We don’t have color printers at school and this has saved me from having to remember to print something at home. I brought in mine from home and then bought a new one for home. 
2. MacBookAir - This is my personal laptop.  I bring it home on weekends and holidays but for the most part I keep it at school.  I did need approval to get it on our district WiFi, which meant my phone could not also be on the WiFi.  There is a one device per teacher rule.
3. A lay-flat binder for my plan book, dismissal binder, and sub binder.  These save so much space and they are flexible. 
4. A laminator at school and a laminator at home.  It took me many years before I caved and bought another one but again, it saves me from remembering to laminate at home and I can also laminate during snack time and preps. Matte laminating is also worth the splurge.
5. My teacher toolbox! This toolbox has been with me for over 10 years, I just change out the labels to go with my decor theme.  Everything has a place and it keeps my desk organized.

Want the links?  Comment “links” below and I will DM you them. 

#classroommanagement #amazonfinds #classroom #teacherhacks #firstgradeteacher
✨Center time just got so much better! ✨ These 1st ✨Center time just got so much better! ✨
These 1st grade phonics-based literacy centers keep my students engaged, independent, and actually cheering when I say it’s center time. 🙌
Year-long skills that spiral and build (short vowels → digraphs → blends → vowel teams → multisyllabic words and more), primary lined recording sheets, supportive visuals, and activities that are easy to prep once and reuse all year.

Perfect for Science of Reading classrooms, Fundations® users, Daily 5, or anyone who wants structured, decodable practice while you pull small groups.

My students know exactly what to do… and I get to teach without interruptions. Win-win! 📚💛

Comment LINK if you want a full year of ready-to-go phonics centers and a free sample set!
#PhonicsCenters  #LiteracyCenters #FirstGradeTeacher  #Phonics #WordWork ReadingCenters
🌻Sunflower Classroom Decor Room Tour🌻 This was my 🌻Sunflower Classroom Decor Room Tour🌻

This was my room decor before the pastels.  It worked well to incorporate my old farmhouse items (my decor theme before that) and as a bonus it made my Ukrainian students smile (the sunflower is the national flower of the Ukrainian).

Do you want the links?  Comment “sunflower” below. 

#classroomdecor #tptcheckoutmyclassroom #firstgradeteacher
Teacher Tip: Sort and store your printables for th Teacher Tip: Sort and store your printables for the upcoming weeks in a file tray above drawers for the days of the week.  This helps to keep you organized for the weeks ahead.
Save and use leftover colored copies as dividers. This makes them less bulky, than if you had used binder clips.
When you near the end of the week, pull the papers from the tray and sort into the weekday drawers and centers.

Have questions?  Ask them below!

#classroomorganization #classroommanagement #teachertips #teacherhacks
Follow on Instagram

Copyright © 2026 · Website Design By Jumping Jax Designs